 Skye Desk
Chapter 2
Organise photos
Bring photos in, look at them closely and fix what would make the LoRA worse.
Create a project
Tell Skye Desk what you want to make, and it sets the project up for that.
- Press ⌘N, or choose File › New Project….
- Answer What do you want to make?: Product shots, Clothing, Character (pictures), Hairstyle, Style, Video character, Video motion or camera move, or Drama series. Set up myself is there too.
- Your choice sets up the folder, the LoRA type, the caption rule, the base model and the checks. You can change it later.
- Video character and Video motion or camera move projects get a Clips section for video. The clips are kept in the clips folder of the project. Export for a trainer takes only the pictures and captions for now, so give the clips to your training tool straight from that folder.
- Drama series is not a LoRA project: it opens Library › Creator, where you make character profiles, series, episodes and shots.
Add photos
Bring a folder of photos into a project.
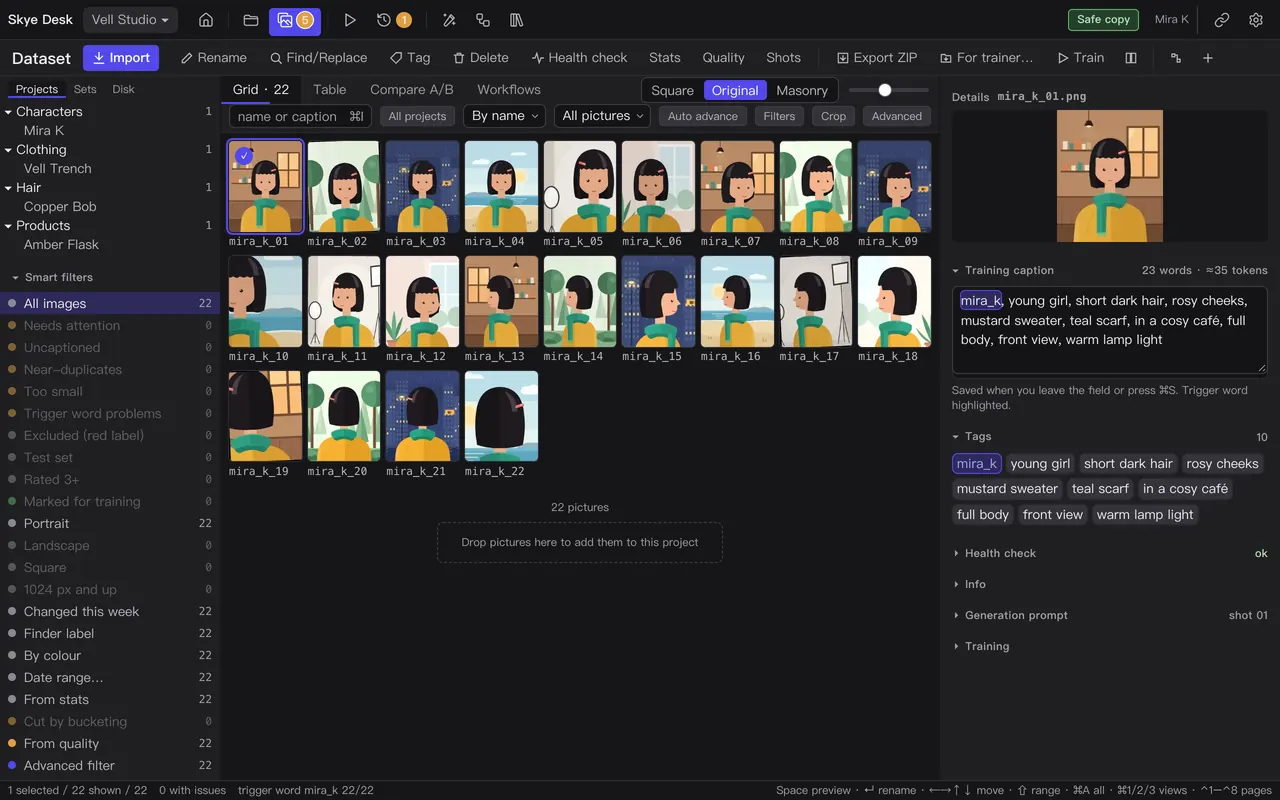
- Open Dataset and pick your project on the left.
- Drag photos or a whole folder onto the grid, or click Import.
- Look at the preview: it shows what will come in and skips exact duplicates.
- Click Import.
Skye Desk reads PNG, JPG, WebP and BMP, and turns HEIC and TIFF photos into PNG as they come in. A caption is a .txt file with the same name as its photo.
Open a folder you already have
Already keep your photos and captions in another layout? Open the folder as a project: Skye Desk recognises 20 common layouts, shows you a preview first, and a short wizard helps with any other layout.
Video clips
Projects for a video LoRA have a Clips section on the Dataset page. It needs ffmpeg installed on your Mac: Skye Desk uses it for thumbnails, lengths and cutting.
- Click Import clips… and choose a folder of videos (MP4, MOV, M4V or WebM). They are copied into the project; the originals stay where they are.
- Cut into training clips cuts at every shot change and into pieces a trainer can use, with frame counts of 4n+1. ⌘Z puts the originals back.
- Every clip is checked: too short, longer than one training clip, a different frame rate, a short side under 480 px, black picture, or a file that cannot be read.
- In a video character project, a bar shows how many pictures and clips you have against the aim for that kind of project.
- The clips are kept in the clips folder of the project. Export for a trainer takes only the pictures and captions for now, so give the clips to your training tool straight from that folder.
Coming later
- Turning an existing folder into a project in place.
Look at a photo up close
See one photo full size without leaving the app.
- Select a photo and press Space.
- Use ← and → to move through the photos.
- Press Space again to close.
Rename, tag and tidy
Work with photos the way you do in Finder.
- Select one photo, or several with ⇧ or ⌘, and press Return to rename them.
- Give photos a colour tag, a rating or a flag.
- Press ⌘⌫ to move photos to Recently deleted.
- Changed your mind? ⌘Z brings them back.
Your originals stay untouched
Skye Desk works on a safe copy, so trying things costs nothing.
The top bar says “Safe copy · originals untouched”. Every rename, delete and caption edit happens in the copy; your original photos are never changed.
- Deleted photos wait in Recently deleted until you empty it.
- Changes to many photos show a preview first, and one ⌘Z undoes them all.
- Photos and captions are ordinary files. Back up your work folder like any other folder.
Dataset versions
- Save a version of the dataset before a big change.
- Compare a saved version with now: photos added, removed or renamed, and every caption that changed.
- Put old captions back from a version, or delete a version you no longer need. Each step can be undone.
Coming later
- Rolling the whole set of photos back to an old version.
- Seeing in Runs which version a training run used.
Where your files live
Your work is ordinary folders on your Mac: what is where, how much space it takes and how to back it up.
Skye Desk works in one folder, the workspace. Each project is a folder in it: your photos, with a .txt caption of the same name next to each one. Skye Desk keeps its own settings and notes in a folder called _desk inside the workspace.
Settings › General shows the workspace folder, and the folder every export starts in.

The safe copy
Skye Desk works on a safe copy, and the top bar says Safe copy. Every rename, delete and caption edit happens in the copy; your original folder stays as it is.
How much space
- Your photos take the same space as before.
- Every export is a full copy of the photos in it, saved in Downloads unless you choose another folder in Settings › General.
- AI models on your Mac, when they arrive, need about 3.6 GB for the first set.
Back up
On Projects, right-click a project and choose Back up as ZIP…: the whole project folder, photos and captions, in one file, saved in your export folder.
Move to a new Mac
- On the old Mac, back up each project as a ZIP and copy the ZIPs to the new Mac.
- On the new Mac, install Skye Desk, create a project for each ZIP and import the ZIP. Captions in .txt files with the same names come in with the photos.
Coming later
- Choosing which folder Skye Desk opens, for example one you have just moved.
Check your photos before training
The Health check finds the photos that would make your LoRA worse.
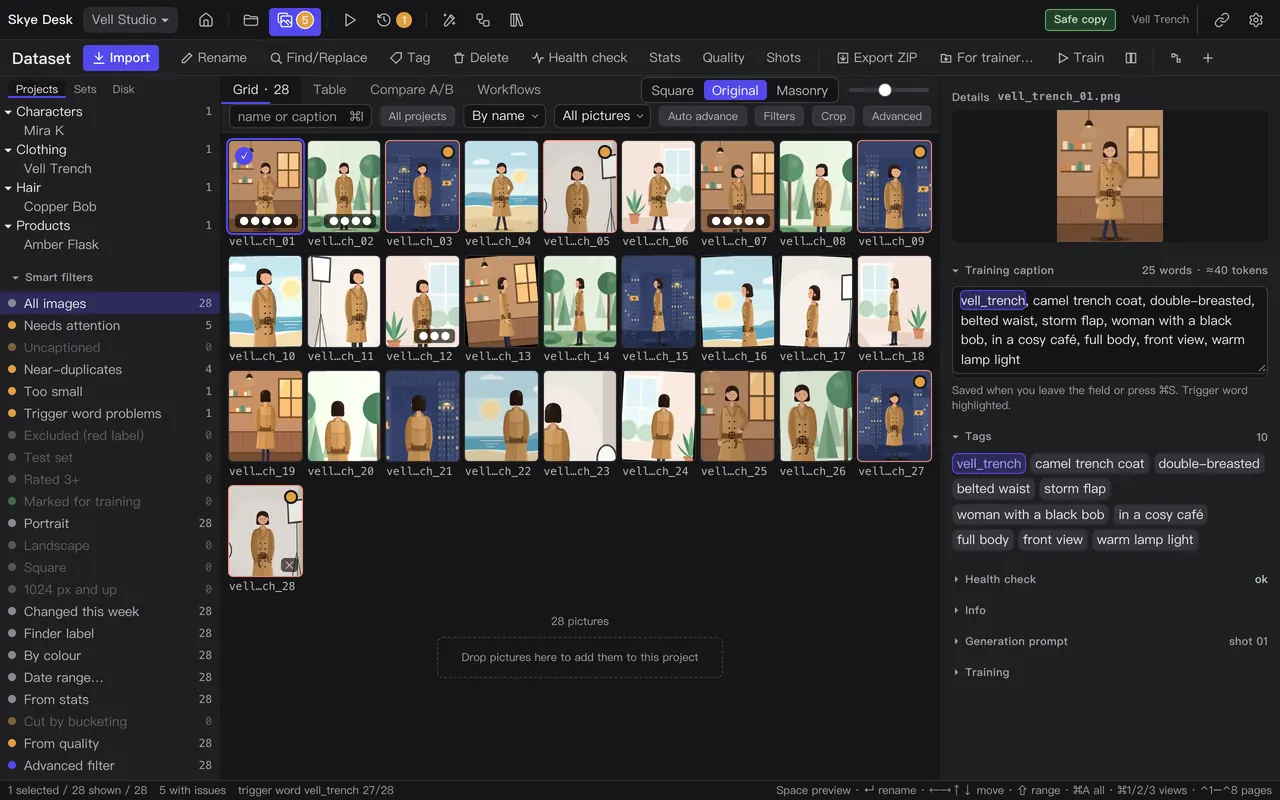
- Click Health check on the Dataset toolbar.
- Each photo is checked for size, caption, trigger word and near-duplicates. Problems show beside the photo.
- Click a smart filter on the left – Needs attention, Uncaptioned, Near-duplicates, Too small, Trigger problems – to see only those photos.
- Select two near-duplicates and press C to see them side by side, then keep the better one.
Quality score
Find the blurry, dark and washed-out photos in one go.
- Open Quality on the Dataset toolbar – when the window is narrow it sits under More.
- Read the score for the whole set, then click Blurry, Too dark, Too bright or Low contrast to see those photos.
- In each group of look-alikes, the sharpest photo is marked keep. Select the others and decide what to do with them.
Stats on the same toolbar shows sizes, shapes and caption lengths; click a bar to see those photos.
Smart filters and folders
Get to the photos that need work, and come back to them later.
- Click a smart filter on the left; each one shows a live count.
- Press \ to open the Filters bar and combine rating, flag, colour tag and caption.
- For number rules – tag count, words, tokens – press ⇧⌘F.
- Save the view as a smart folder. Its count follows your changes.
Angles and framing
See whether your photos cover enough angles.
- Open Shots on the Dataset toolbar – when the window is narrow it sits under More.
- Read which angles and framings your captions mention, compared with what this kind of project needs.
- Missing some? Shoot them, or let Skye Desk write a ComfyUI draft for the missing ones.
Shots reads your captions. Photos whose captions do not say the angle are left out.