 Skye Desk
Chapter 4
Train and choose
Set up a run, check it before it starts, and keep the best version.
Set up a training run
Pick a starting point and see why each setting is what it is.
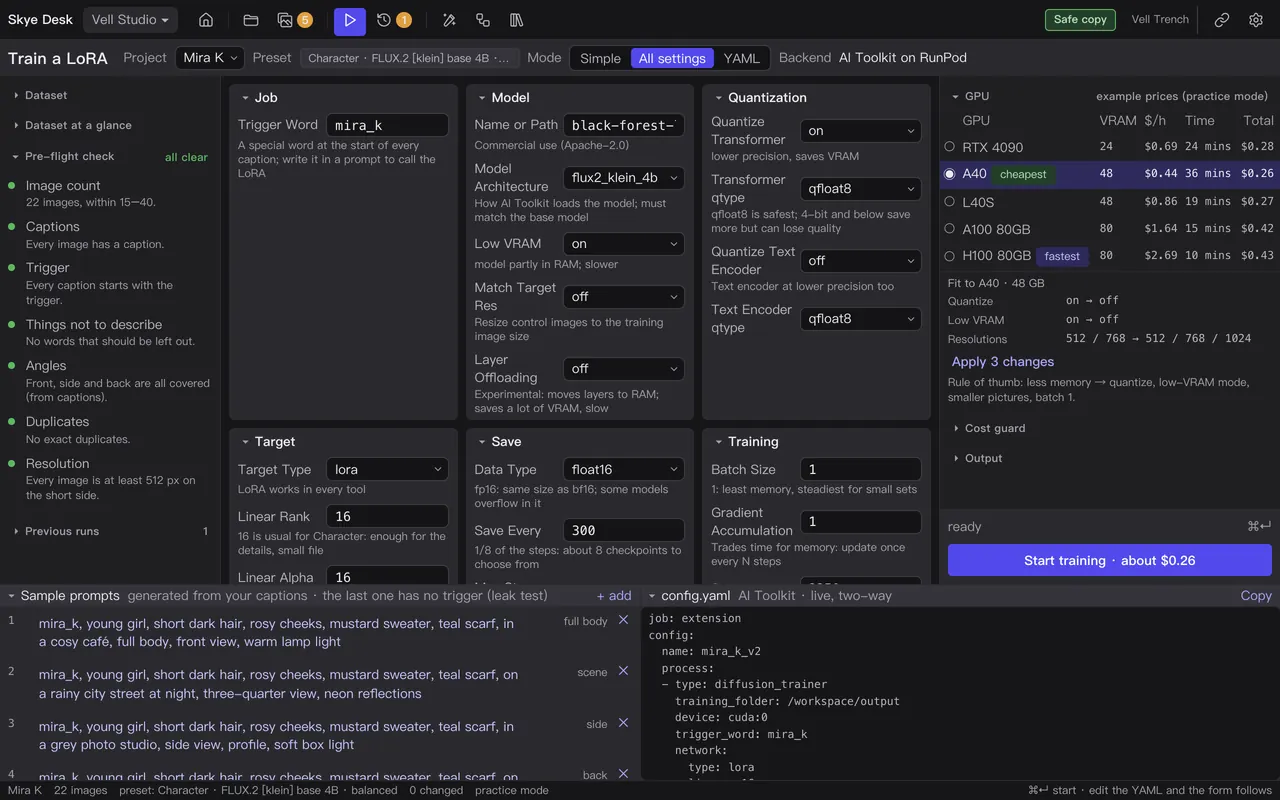
- Open Launch and check the project at the top.
- Pick a preset. Values you change from it are marked, and the top shows how many.
- Stay in Simple, open All settings, or edit the YAML – the form and the YAML follow each other.
- Hover a setting to read why it has that value.
- Choose your GPU and click Fit to see what to change so the run fits its memory.
The check before training
Catch the problems that would waste a run.
- Read the Pre-flight check on Launch: image count, captions, trigger word, words that should not be there, angles, duplicates and size.
- Click a yellow or red row to see the photos it is about, and fix them.
- Check the sample prompts. The last one has no trigger word on purpose: if your subject still appears, it leaks into everything.
Export for your training tool
Get the dataset into the layout your trainer expects.
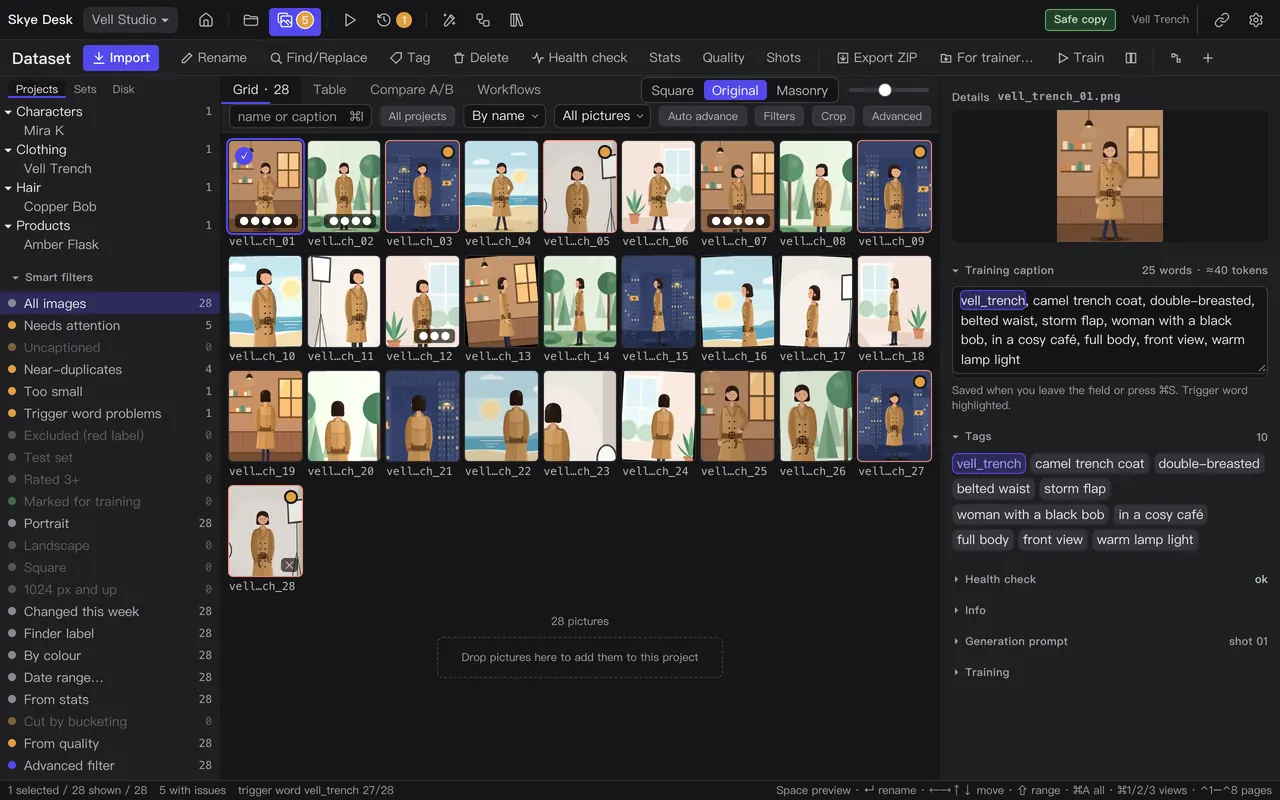
- Give every photo a caption; the Uncaptioned filter shows any you missed.
- Open the export panel (⌥⌘E) and choose kohya_ss, OneTrainer, AI Toolkit or a Hugging Face image folder.
- Choose where to save it. A report of duplicates comes with it.
- Open the folder in your training tool and start training there.
Train with your own tool
The first beta does not train by itself: export the dataset, train in AI Toolkit, OneTrainer or kohya_ss, and keep the best result.
Skye Desk prepares and checks the dataset; the training runs in a tool you already use, on a computer that can train. Each export is a new folder with your photos, their captions, duplicates.csv and HOW TO USE.txt, which names the exact folder to point your tool at.
What the export looks like
Vell Trench · AI ToolkitdatasetPoint your tool herefolder_pathvell_trench_01.jpgvell_trench_01.txtvell_trench_02.jpgvell_trench_02.txt…duplicates.csvHOW TO USE.txtVell Trench · OneTrainervell_trenchPoint your tool herepathvell_trench_01.jpgvell_trench_01.txtvell_trench_02.jpgvell_trench_02.txt…concepts.jsonduplicates.csvHOW TO USE.txtVell Trench · kohya_ssimgPoint your tool heretrain_data_dir10_vell_trenchvell_trench_01.jpgvell_trench_01.txtvell_trench_02.jpgvell_trench_02.txt…duplicates.csvHOW TO USE.txtVell Trench · Hugging Face imagefolderPoint your tool heredata_dirtrainvell_trench_01.jpgvell_trench_02.jpg…metadata.jsonlduplicates.csvHOW TO USE.txtAI Toolkit
- Export with AI Toolkit as the trainer.
- In your AI Toolkit config, set the dataset folder_path to the dataset folder in the export.
- Use the same trigger word as your project; HOW TO USE.txt repeats it.
- Start the job. AI Toolkit reads JPG and PNG, so Skye Desk has already turned any WebP or BMP into PNG.
Launch writes an AI Toolkit config from the settings you chose. Click Copy next to config.yaml, paste it into AI Toolkit and change folder_path to your export.
OneTrainer
- Export with OneTrainer as the trainer.
- In OneTrainer, open the Concepts tab, add a concept and set its path to the folder named after your trigger word. HOW TO USE.txt gives the full path.
- Set the prompt source to From text file per sample, so that each photo uses its own caption.
- Or copy concepts.json into OneTrainer’s training_concepts folder and choose it on the Concepts tab.
kohya_ss
- Export with kohya_ss as the trainer and set Repeats. A Class is optional.
- In kohya_ss, set the image folder (train_data_dir) to the img folder in the export.
- The folder inside it is named the way kohya expects: the repeat count, then the trigger word and class, such as 10_vell_trench for Repeats 10 and no class.
- Each photo’s .txt caption is used instead of the folder name.
After training
Your tool saves a .safetensors file every few hundred steps, and sample pictures if you asked for them. Look at the samples, keep the step that looks most like your subject and use that file in ComfyUI.
Coming later
- Bringing your tool’s checkpoints and sample pictures into Runs, to compare them and set the final version there.
Training in the cloud
Rent a GPU and train without leaving Skye Desk.
This is the part that is not ready yet: starting the run, watching it and stopping the GPU all happen in Skye Desk later. You will need an account with a GPU service such as RunPod.
Coming later
- Start a cloud run from Launch.
- A spending limit, and the GPU stopping by itself when the run ends or sits idle.
- Live progress and the loss curve.
- Downloading checkpoints from the GPU.
Don’t want to use a cloud GPU?
Ways to train without renting a GPU, and to pick the result in Skye Desk.
| Way | Can you use it now? | What you need |
|---|---|---|
| Export the dataset and train with your own tool | Ready in the first beta | AI Toolkit, OneTrainer or kohya_ss, on any computer that can train, your own NVIDIA PC included. |
| Bring the checkpoints and samples back to Skye Desk to pick the final version | Ready in the first beta | Runs › Import training…, for AI Toolkit, OneTrainer and kohya output. |
| Connect your own NVIDIA computer | Coming later | A computer with an NVIDIA graphics card that runs AI Toolkit. |
| Train on this Mac | Being evaluated | Nothing to set up: it is not decided yet. |
Your own tool, today
Export the dataset for AI Toolkit, OneTrainer or kohya_ss, train wherever that tool runs and use the result in ComfyUI.
Bring the results back
In Runs, choose Import training… and pick the output folder of AI Toolkit, OneTrainer or kohya. The checkpoints and samples come in as a run, so you can compare them and pick the final version.
Your own NVIDIA computer
Coming later
- Starting a run from Skye Desk on your own NVIDIA computer, through AI Toolkit.
On this Mac
Training on the Mac itself is being evaluated. Nothing is decided, and there is no date.
Pick the final version
Compare the steps of a run and keep the one that looks most like your subject.
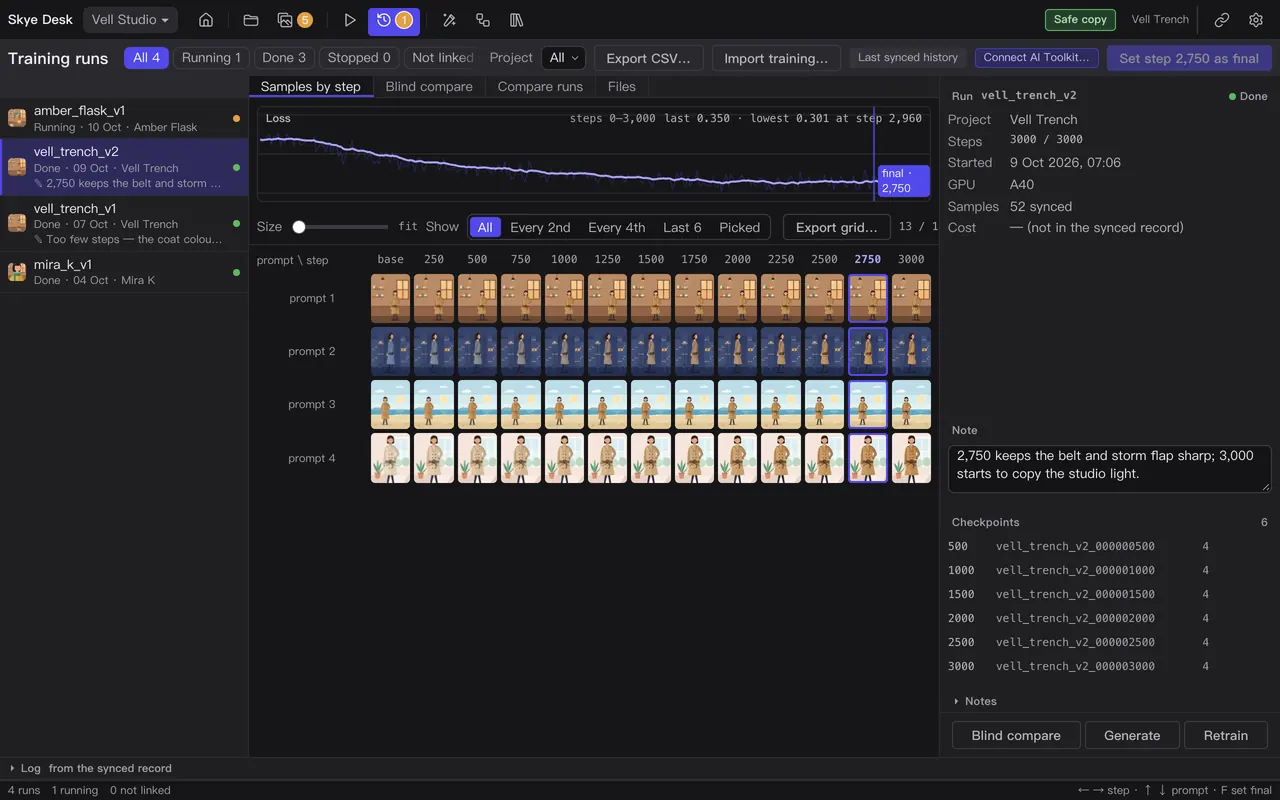
- Open Runs and choose a run.
- Read the prompt × step grid. Hover a picture to enlarge it, and hide steps you do not need.
- Select a few steps and press C to see them side by side; they zoom together.
- Start a blind test: two samples, steps hidden. Vote with ← → ↓; ⌘Z takes a vote back.
- Press F on the step you keep. It becomes the final version.
Ready in the first beta Runs › Import training… brings in the checkpoints and sample pictures from AI Toolkit, OneTrainer or kohya, so you can compare them and pick the final version here.Train with your own toolDon’t want to use a cloud GPU?
Compare runs
See what changed between two training runs.
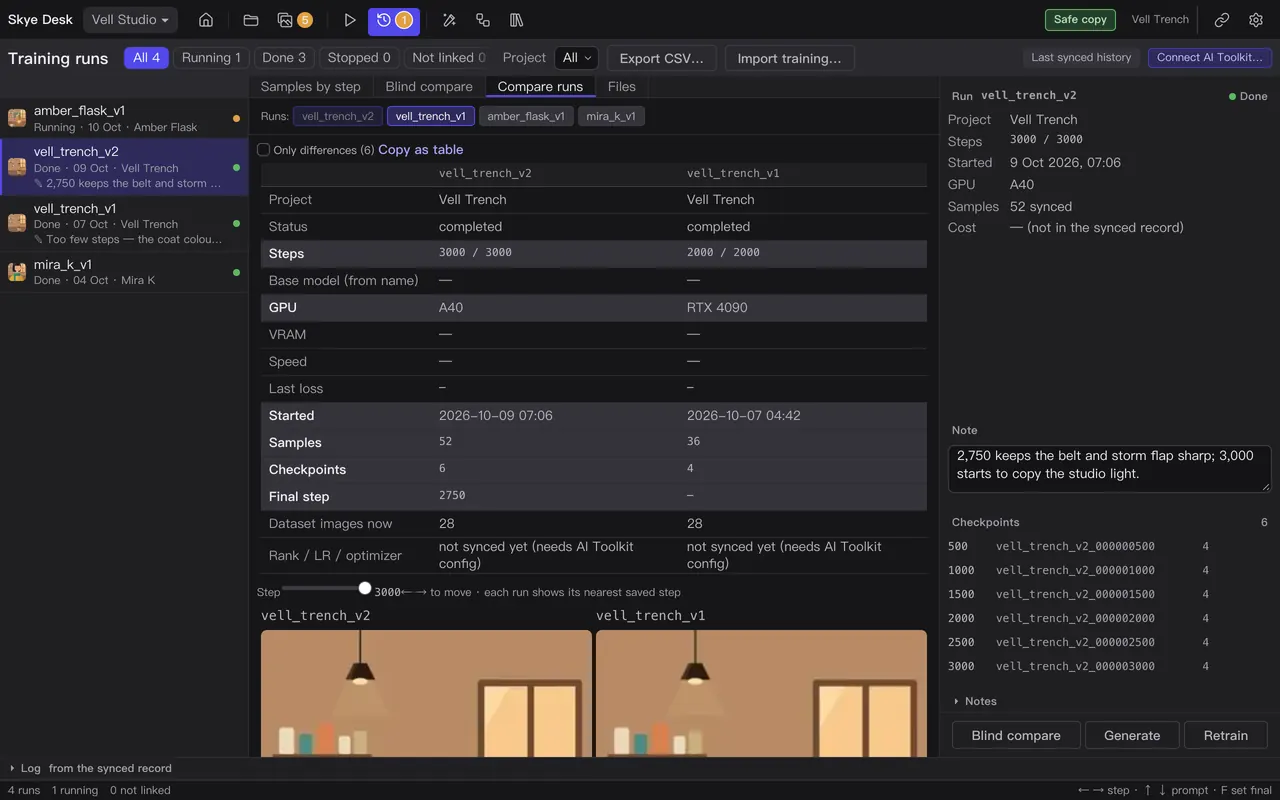
- In Runs, choose Compare runs.
- Settings that differ are marked; show only the differences if you like.
- Write a note on a run so you remember what you tried.
- Export the list as CSV, or the grid as a PNG or PDF.
Coming later
- Bringing the checkpoints and sample pictures from your own training tool into Runs.
- Live progress of a running training.
- Strength-by-version grids made in ComfyUI.